Who says beach nails need salon-level skills or a suitcase full of tools?
With a few beginner-friendly techniques, you can turn simple polish shades into ocean waves, sandy gradients, seashell accents, and sunset-inspired designs that look fresh and effortless.
This guide is packed with easy beach-inspired nail art ideas you can recreate at home, even if your hands aren’t perfectly steady.
Think soft blues, pearly whites, coral pops, and tiny coastal details-simple enough for beginners, but pretty enough to feel like vacation on your fingertips.
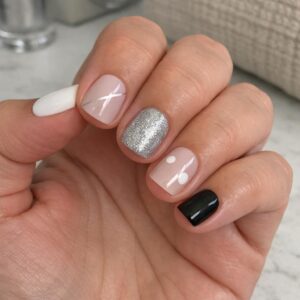
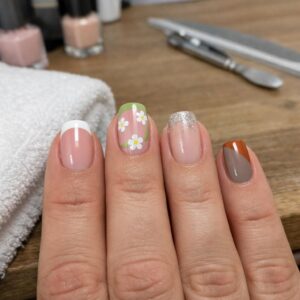
What Makes Beach-Inspired Nail Art Beginner-Friendly?
Beach-inspired nail art works well for beginners because the designs are naturally imperfect. Waves, sand textures, seashell accents, and sunset gradients do not need razor-sharp lines, so small mistakes often blend into the look instead of ruining it.
Another benefit is that you can start with basic nail art tools instead of booking a salon appointment or buying a full professional nail kit. A sheer nude polish, a blue gel nail polish, a sponge, dotting tool, and a glossy top coat are enough for many simple beach nail designs.
- Makeup sponges help create ocean or sunset gradients without advanced brush skills.
- OPI or similar quality polish brands offer beach-friendly shades that apply smoothly.
- A small detail brush can turn uneven white lines into soft sea foam.
In real life, this is why beach nails are popular before vacations, pool parties, and summer events. For example, a beginner can paint two coats of sandy beige, dab turquoise polish near the tips, and add tiny white dots for a “shoreline” effect in less than an hour.
If you use gel polish, a UV LED nail lamp can make the manicure more durable, especially for travel or beach days where regular polish may chip faster. The key is choosing forgiving designs, quick-dry products, and simple color combinations that look intentional even when they are not perfectly symmetrical.
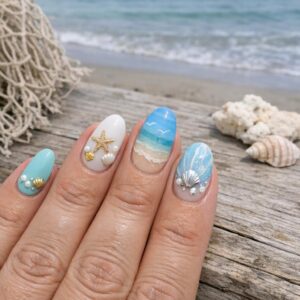
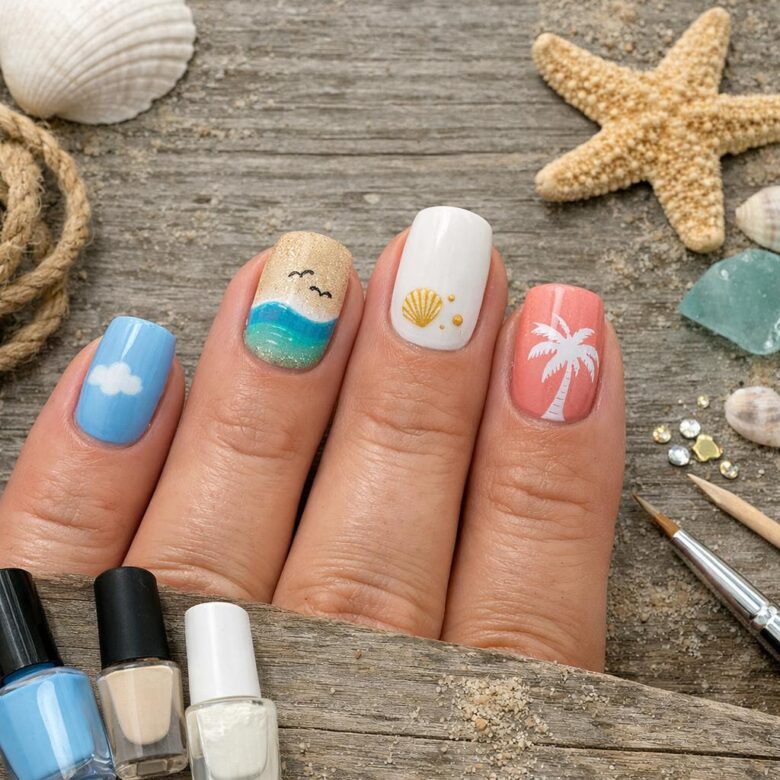
Easy Beach Nail Art Designs You Can Create with Basic Tools
You do not need professional salon equipment to create beach nail art at home. A few affordable manicure tools-like a dotting tool, makeup sponge, striping brush, and a good top coat-can help you get clean, vacation-ready results without paying full nail salon prices.
For a simple ocean fade, apply a nude or pale blue base, then use a small makeup sponge to dab turquoise and white polish near the tips. This creates a soft seafoam effect that looks especially polished when sealed with a glossy gel top coat and cured under a UV LED nail lamp.
- Dotting tool: Use it to make white “bubble” dots, tiny pearls, or starfish centers.
- Striping brush: Paint thin palm tree trunks, wave lines, or nautical stripes.
- Makeup sponge: Blend sunset colors like coral, peach, and gold for an easy beach gradient.
A real-world trick I’ve seen work well is keeping the design on just one or two accent nails. For example, paint most nails sandy beige, then add a blue wave and tiny gold shell detail on the ring finger for a clean look that feels stylish but not overdone.
If you are buying nail art supplies online, starter kits from Amazon or beauty retailers often include brushes, dotting pens, rhinestones, and striping tape at a lower cost than buying each item separately. Choose quick-dry polish or gel nail polish if you want better durability for beach trips, swimming, or summer events.
Common Beginner Mistakes That Ruin Beach Nails-and How to Fix Them
One of the biggest mistakes with beach nail art is painting over oily or damp nails. Sunscreen, lotion, and cuticle oil can stop gel nail polish or regular polish from bonding properly, which leads to peeling within a day. Before you start, wipe each nail with rubbing alcohol or a nail dehydrator, then apply a thin base coat.
Another common issue is using thick layers because the colors look more “tropical” in the bottle. Thick polish takes longer to dry, smudges easily, and can bubble under a UV LED nail lamp. For a clean ocean-blue gradient or sandy nude base, use two or three thin coats instead of one heavy coat.
- Messy waves: Use a fine nail art brush or dotting tool instead of the polish brush for better control.
- Chipped tips: Cap the free edge with base coat, color, and top coat to seal the manicure.
- Uneven stickers: Press nail decals flat with tweezers before sealing them with a glossy top coat.
I’ve seen beginners do a beautiful seashell design, then ruin it by applying top coat too quickly. For example, white wave lines can drag across a turquoise base if they are not fully dry. A quick-dry top coat or a proper gel top coat cured with a MelodySusie UV LED Nail Lamp can help protect the design.
Finally, don’t skip aftercare. Beach-inspired nails last longer when you use cuticle oil daily and wear gloves while cleaning, especially if you invested in an at-home manicure kit or salon-quality nail supplies.
Final Thoughts on Easy Beach-Inspired Nail Art Ideas for Beginners
Beach-inspired nails work best when they feel relaxed, not overly perfect. Start with one simple detail-soft waves, a sandy accent, tiny shells, or a sunset blend-and keep the rest of the manicure clean so the design stays wearable. If you’re new to nail art, choose forgiving colors, use a dotting tool or toothpick, and seal everything with a glossy top coat for a fresh, vacation-ready finish. Pick the idea that matches your time, tools, and confidence level; even the easiest design can look polished when the colors are cohesive and the edges are neat.

Dr. Claire Whitmore is a nail care educator and beauty researcher focused on healthy nail routines, elegant manicure techniques, and coastal-inspired nail artistry. Her work combines practical beauty guidance with refined, everyday nail care.